Our house, when we bought it, came with a very tiny--but very attractive--lush green triangle of lawn in the front yard. The previous owner was obviously a lawn man, and the grass was golf-course perfect.
Awesome and I are NOT perfect lawn people. I love gardening, as you know, but in a more meadow-like, wild, natural, and free way than the more manicured garden usually associated with lawns. And Awesome, well, he loves the park-like lawn in theory, but since that requires a lot of work, it just isn't going to happen.
Four years and a Northern California drought since we bought the house, and the front yard triangle is a lot more brown than green. Unless you count the weeds. Those are green.
I've been dreaming of transforming the front border since even before we moved in. My roses and picket fence are crying for the company of a lot of cottage garden plants. And the "lawn"...well, it just has to go.
We are lucky to live in a town that has a Cash for Grass incentive to give homeowners money for replacing their lawns with water-wise plantings. The program offers $1 a square foot for replacing the lawn.
We are unlucky to have such a tiny lawn. It probably isn't worth the twenty bucks we'd receive to go through the approval process. So we aren't going to go that way. However, if you live in the Bay area and have a larger lawn that you'd like to replace, I'd recommend checking the program out. It seems like a great deal.
This is what our yard looks like now:

Ugh.
This is what I'd like our front yard to look like:

Image from http://www.finegardening.com/front-yard-garden-no-time
(Yeah, yeah, I know my yard is the size of a postage stamp, but it's still possible! On a miniature scale.)
I've been researching steps to get the soil ready for planting. There are several methods to choose from, some involving herbicides and shovels. It seems to be highly recommended to sheet mulch your lawn, which basically means covering the grass with a thick layer of newspaper and compost, and waiting for a season before planting. That would be a great method for us, if it was fall and the lawn was in the back yard, but I want the place to look better, not worse. I found one site that says you can use the same method, but cut holes through the newspaper for the plants you are adding, so they can get established while the compost is doing its thing. That's what I'm planning on doing, because I need somewhat-instant gratification in this case.
Our waste management offers organic compost that is made from the yard waste they collect. It costs about $8 a truckload, so economically it's the way to go. Of course, we have to borrow a truck to get it and spend all day shoveling it, but it's still worth it.
Plant criteria:
Must be able to withstand semi-drought conditions
Must be a reliable performer--no prima-donas in my yard!
Must love hot and sunny conditions but also tolerate afternoon shade
Must be perennial
Should be evergreen (a few deciduous plants are allowed, but I want the garden to look nice all year)
Possible plants:
Lavender:
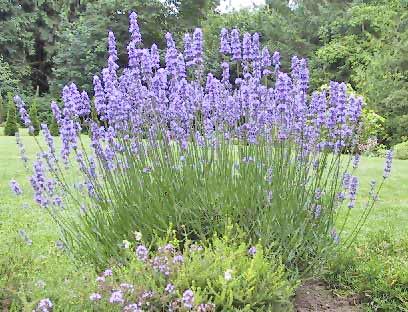
Image from www.growinginmygarden.com
Easy to grow, hard to kill, lavender looks nice all year, and blooms for at least six months. Bees love it, and it is a cottage garden stand-by. It also is an herb, so its usefulness is basically endless, which is a plus.
Rosemary:
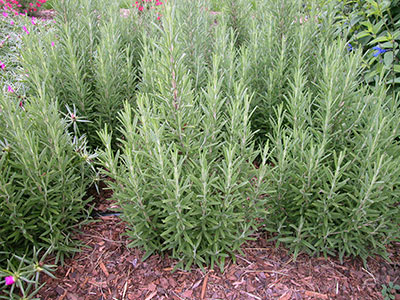
Image from http://gardeningsolutions.ifas.ufl.edu/plants/edibles/vegetables/rosemary.html
Another wonderful herb, I already have several rosemary plants, and love it for its ease and reliability. Plus the wonderful smell--rosemary is a great anchor plant for any garden. Both the upright version and the trailing version would be good for my front lawn space. I may just transplant the plants I already own.
Thyme:

Image from bonnieplants.com
Thyme is a very versatile plant. It comes in a variety of sizes and colors, so I may have a couple of different kinds, depending on my needs. Thyme can make a great ground cover, and in my experience, it will sometimes reseed itself too, so one plant becomes 20 plants.
Russian Sage:

Image from dallasgardens.com
Russian sage thrives in our area. It is being used more and more as a landscaping plant, and looks good most of the year. I don't know if it's evergreen or not, but since I will probably only have one plant anyway, I'm not going to worry about it.
Salvia:

from galleryhip.com

from parkswholesaleplants.com

from gardencoachpictures.wordpress.com
The salvia family is huge, so there are lots of choices. I'll probably choose a few varieties and colors. Salvia is another performer, and like the above plants, is easy to grow and reliable.
Guara:

from gardenality.com
One of my personal favorite flowers, I have never grown guara but I love it! It's so pretty.
There are so many other plants I could choose from. These are just a few that I know are foolproof and do well in my area.
Obviouly, we have a lot of work to turn our plans into reality. I'll keep you updated as our new garden unfolds.


